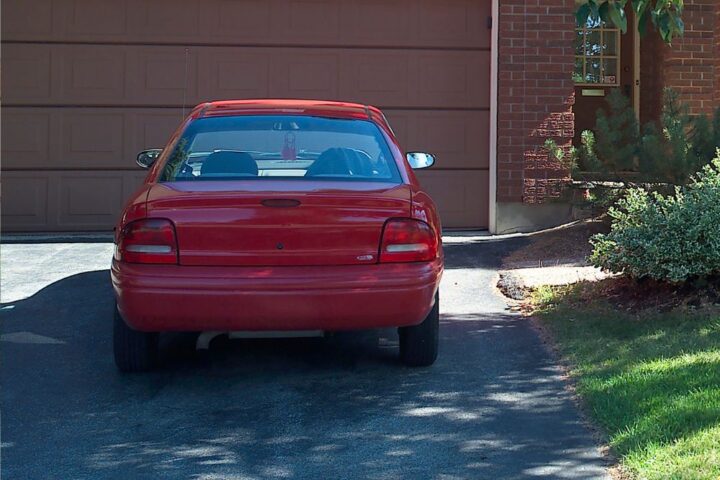
Maintaining the integrity and functionality of your concrete driveway is essential to ensure its longevity and curb appeal. However, over time, wear and tear can take its toll, leaving you with a cracked and uneven surface that not only looks unsightly but also poses potential hazards.
If you find yourself facing the daunting task of repaving your concrete driveway, fear not, for with the right knowledge and approach, you can restore it to its former glory. In this discussion, we will explore the step-by-step process of repaving a concrete driveway, from assessing its condition to applying the new concrete.
So, whether you are a DIY enthusiast or simply looking to familiarise yourself with the process, continue reading to discover the secrets behind achieving a smooth and durable driveway surface.
Assess the Condition of Your Driveway
To accurately determine the necessary course of action, it is crucial to thoroughly assess the condition of your concrete driveway for any signs of damage or deterioration. Start by carefully inspecting the surface for cracks, potholes, discolouration, or surface stains. These are common indicators of damage that may require attention. Assess the severity of the damage to determine if it can be effectively repaired through resurfacing.
Consider the age and overall condition of the driveway. A newer driveway with minor surface imperfections may be a good candidate for resurfacing. However, if the driveway is significantly aged or has extensive damage, resurfacing may not provide a long-term solution.
Take note of any areas with extensive or deep damage. These areas may require specialised repair before resurfacing can take place. It’s important to address these issues to ensure a smooth and durable surface.
Lastly, evaluate if the current state of the driveway warrants resurfacing as a cost-effective alternative to complete replacement. Resurfacing can be a more affordable option, especially if the existing surface is in relatively good condition.
Gather the Necessary Tools and Materials
Before you begin repaving your concrete driveway, it is essential to gather the necessary tools and materials.
The tools you will need include a pressure washer, concrete patching compound, trowel or squeegee, and a broom or brush.
Additionally, you will require concrete resurfacer as the main material for the project.
Tools Needed
In order to successfully repave a concrete driveway, it is essential to gather the necessary tools and materials.
For concrete driveway resurfacing, you will need a few key tools. First, a pressure washer is crucial for thoroughly cleaning the existing concrete surface. This will help ensure proper adhesion of the new coating.
Next, you will need a concrete patching compound to repair any cracks or damage on the old driveway. A trowel or squeegee will be necessary for applying the concrete coating, spreading it evenly across the surface.
Lastly, a broom or brush will come in handy for smoothing out the resurfacing material and creating a uniform finish.
Materials Required
In order to successfully repave a concrete driveway, it is essential to gather the necessary tools and materials.
The first material required is concrete resurfacer, which is used to give the old, damaged driveway a fresh new look.
Additionally, a high-pressure cleaner is necessary to thoroughly clean the surface before applying the resurfacer.
Another material that is needed is concrete patching compound, which is used to fill in any cracks or holes in the driveway.
To apply the resurfacer and patching compound, a trowel or squeegee is necessary.
Finally, a broom or brush is required to sweep away any debris and ensure a clean surface for the resurfacing process.
Preparation Steps
To properly prepare for repaving a concrete driveway, it is imperative to gather the necessary tools and materials mentioned in the previous subtopic. Here are the essential items you will need:
- A 3,500-psi pressure washer: This powerful tool is crucial for cleaning the driveway surface thoroughly before resurfacing.
- Concrete patching compound: Use this compound to repair any large cracks or spalled areas on the driveway.
- Power drill with a paddle mixer attachment: This tool ensures lump-free mixing of the concrete resurfacer, allowing for a smooth and even application.
Prepare the Surface for Repaving
To prepare the surface for repaving a concrete driveway, there are three key points to consider.
Firstly, the driveway needs to be thoroughly cleaned and any debris removed.
Secondly, any cracks or damage should be repaired to ensure a smooth and even surface.
Lastly, applying a primer coat will help to improve adhesion and ensure a successful repaving project.
Clean and Remove Debris
Prior to repaving a concrete driveway, it is imperative to thoroughly clean and remove any debris from the surface. This step is crucial in order to ensure proper adhesion of the new concrete overlay and to achieve a smooth, professional-looking finish.
Here are the steps to clean and remove debris from your driveway:
- Use a high-pressure washer with a minimum of 3,500 psi to remove dirt, grime, and loose particles.
- Inspect the driveway for any large cracks or spalled areas and repair the damage before proceeding with the cleaning process.
- Hose down the entire driveway to saturate it and prepare it for cleaning.
Repair Cracks and Damage
In order to prepare the surface for repaving, it is crucial to repair any cracks or damage on the driveway. This step ensures that the new concrete will adhere properly and create a durable surface. Here are some recommended methods to repair cracks and damage on a concrete driveway:
| Method | Description |
|---|---|
| Epoxy coating | Fill small cracks and damaged concrete with epoxy coating for a smooth finish. |
| Concrete patching compound | Apply concrete patching compound to larger cracks and damaged areas to strengthen the surface. |
| Expansion joint sealant | Use expansion joint sealant to fill expansion joints and prevent future cracking. |
| Resurfacing | If the damage is extensive, consider resurfacing the entire driveway for a fresh and even surface. |
| Preventive maintenance | Regularly inspect and repair any driveway cracks to prevent further damage. |
Apply Primer Coat
Applying a primer coat is a crucial step in preparing the surface for repaving a concrete driveway. Before applying the primer coat, it is important to clean the driveway thoroughly to remove any dirt, oil, and debris. This can be done using a pressure washer to ensure a clean surface for the primer to adhere to.
Once the driveway is cleaned and any deep cracks or damaged areas have been repaired using a concrete patching compound, the primer coat can be applied. The primer acts as a bonding agent, ensuring proper adhesion of the resurfacing material to the concrete slab.
To apply the primer coat, use a wide-head concrete broom to evenly spread it over the entire surface of the driveway.
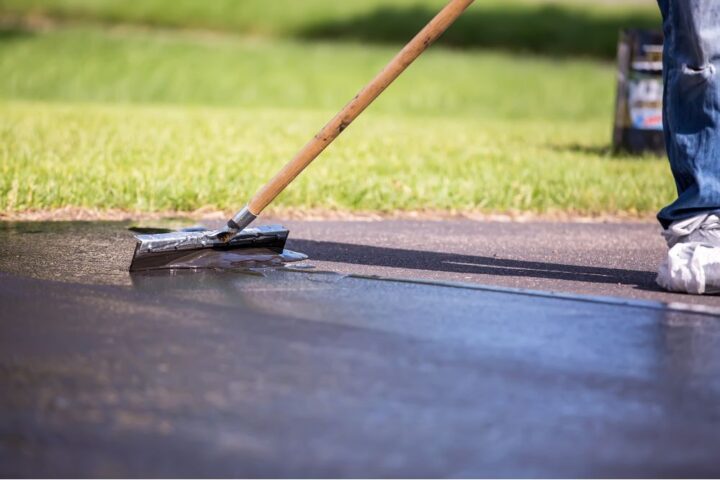
Mix and Apply the New Concrete
To ensure a smooth and durable finish, it is essential to properly mix and apply the new concrete resurfacer for your driveway. Before starting the mixing process, gather all the necessary materials, including the concrete resurfacer and a power drill with a paddle mixer attachment. This will help you achieve a lump-free mixture, ensuring a uniform application.
Begin by pouring the required amount of concrete resurfacer into a clean mixing container. Attach the paddle mixer to the power drill and insert it into the container. Turn on the drill and mix the resurfacer thoroughly, making sure there are no clumps or dry spots. Adjust the consistency by adding more water or resurfacer as needed, following the manufacturer’s instructions.
Once the mixture is smooth and well-blended, you can proceed with the application process. Working in small sections, pour the mixed resurfacer onto the driveway and spread it evenly using a long-handled squeegee. Use smooth, sweeping motions, moving back and forth to ensure an even distribution. Continue this process until the entire driveway is covered.
After applying the resurfacer, allow it to set for five minutes. Then, go over the surface with the squeegee once again, using the same back and forth motion. This will help achieve a consistent texture and appearance.
Taking the time to mix and apply the new concrete resurfacer properly will give your driveway a fresh and revitalized look. By following these steps, you can achieve a professional finish without having to start from scratch.
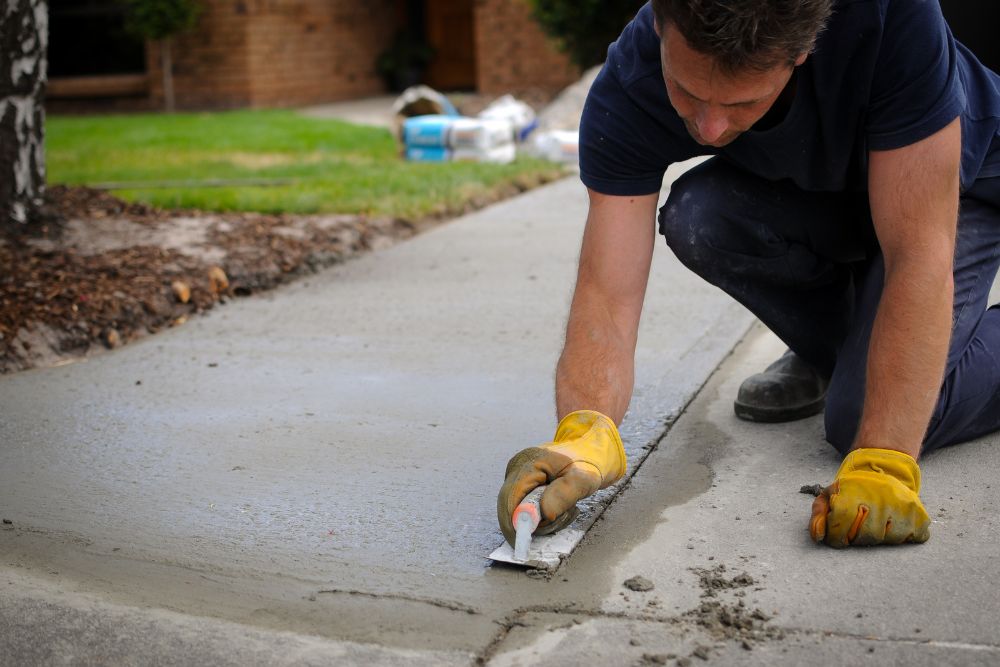
Smooth and Level the New Concrete
After properly mixing and applying the new concrete resurfacer, the next step is to ensure a smooth and level finish for your driveway. This step is crucial to not only enhance the appearance of your driveway but also to prevent any potential damage in the future. Here are some key steps to follow:
- Use a long-handled squeegee: This tool will allow you to smooth and level the new concrete in sections, providing better control, especially for larger driveways. By working in smaller sections, you can ensure a more even finish.
- Scrub the material into the concrete: Pour the resurfacer onto the driveway in foot-wide strips and spread it evenly using the long-handled squeegee. Make sure to scrub the material into the concrete to ensure proper adhesion.
- Consider expansion joints and cracks: Pay attention to any existing expansion joints or cracks in your driveway. Fill in small cracks with the resurfacer and use a pressure washer to clean out larger cracks before applying the concrete. This will help create a more durable and seamless finish.
Allow the Concrete to Cure
The curing process of the newly resurfaced concrete driveway is a critical step that must be allowed to occur for optimal results. After smoothing and levelling the new concrete, it is important to give it time to cure properly. This ensures that the driveway becomes strong, durable, and long-lasting.
To begin the curing process, it is recommended to wait at least six hours before walking on the surface. This allows the resurfacer to set and harden. However, it is important to note that driving on the driveway should be avoided for a minimum of 24 hours after the resurfacing is complete.
In hot weather conditions, it is beneficial to mist the driveway intermittently for up to 48 hours. This helps to prevent the concrete from drying out too quickly, which can lead to cracking. In mild weather, the resurfacer will cure on its own without the need for additional misting.
When calculating the cost of repaving a concrete driveway, it is important to consider the size of the area. Most resurfacing products cover approximately three and a half square metres per bag. If the driveway is larger than 144 square metres, it may be more cost-effective to purchase the resurfacer in bulk.
Maintain and Protect Your Repaved Driveway
How can you ensure the longevity and appearance of your repaved driveway? Proper maintenance and protection are key. Regular cleaning, the application of a concrete sealer, and the use of expansion joints are essential steps in maintaining and protecting your repaved driveway.
To maintain the condition of your repaved driveway, it is important to regularly clean it to remove dirt and debris. Avoid using harsh chemicals or de-icing salts as they can damage the surface. Instead, opt for gentle cleaning methods to keep your driveway looking its best.
Applying a concrete sealer is another crucial step in protecting your repaved driveway. A concrete sealer helps to prevent stains, fading, and damage caused by freeze-thaw cycles. It provides a protective barrier that keeps your driveway looking new and enhances its longevity.
Using expansion joints is also important for protecting your repaved driveway. These joints help to prevent damage from vehicle and foot traffic by allowing for movement and reducing stress on the concrete. Consider adding an epoxy coating for enhanced durability and visual appeal.
Frequently Asked Questions
Is It Worth Resurfacing a Concrete Driveway?
Resurfacing a concrete driveway offers several benefits, including cost-effectiveness, time savings, and increased durability. However, factors such as the extent of damage and personal preferences should be considered. Consulting with a professional can help avoid common mistakes and ensure long-lasting results.
Can You Resurface a Concrete Driveway Yourself?
DIY resurfacing of a concrete driveway is possible, but it requires certain tools and expertise. Step-by-step process includes cleaning, repairing cracks, applying bonding agent, and pouring overlay. Common mistakes to avoid are improper mixing and insufficient curing time. Pros include cost savings, but cons include potential for mistakes. Alternatively, professional resurfacing ensures a high-quality, long-lasting result, but at a higher cost.
What Is the Cheapest Way to Resurface a Concrete Driveway?
When considering resurfacing a concrete driveway, there are several cost-effective options available. DIY repairs can be a budget-friendly choice, while creative decorative techniques offer aesthetic appeal. Factors to consider include longevity, the pros and cons of hiring professionals, and the environmental impact.
Can I Repair My Concrete Driveway Myself?
Repairing a concrete driveway yourself can be a cost-effective solution for common problems such as cracks and spalling. Necessary tools include a concrete patching compound and a trowel. However, it’s important to consider the best time for repairs and weigh the pros and cons of professional vs DIY repairs.
Conclusion
By following the steps in this guide, you can restore and maintain your concrete driveway for long-lasting use.
If you need help with repaving your concrete driveway, speak to us now on 0403 292 005 or luke@smoothconcrete.com.au.