If you just found a crack in your exposed aggregate concrete driveway and are looking for a solution, we are here to help!
Exposed aggregate concrete, with its unique and aesthetically pleasing surface embedded with small stones, can pose a unique challenge when it comes to damage. The process isn’t just about fixing the crack – it also involves matching and blending the repaired section with the existing aggregate.
It may sound intimidating, but armed with the correct tools, suitable materials, and a systematic step-by-step process, a flawless repair can be achieved. But let’s not get ahead of ourselves. Before we delve into the specifics of the repair process, it’s important to understand why cracks form in exposed aggregate concrete driveways in the first place so we can prevent future ones from occurring.
So, stick with us as we navigate this journey together.
Identifying the Damage
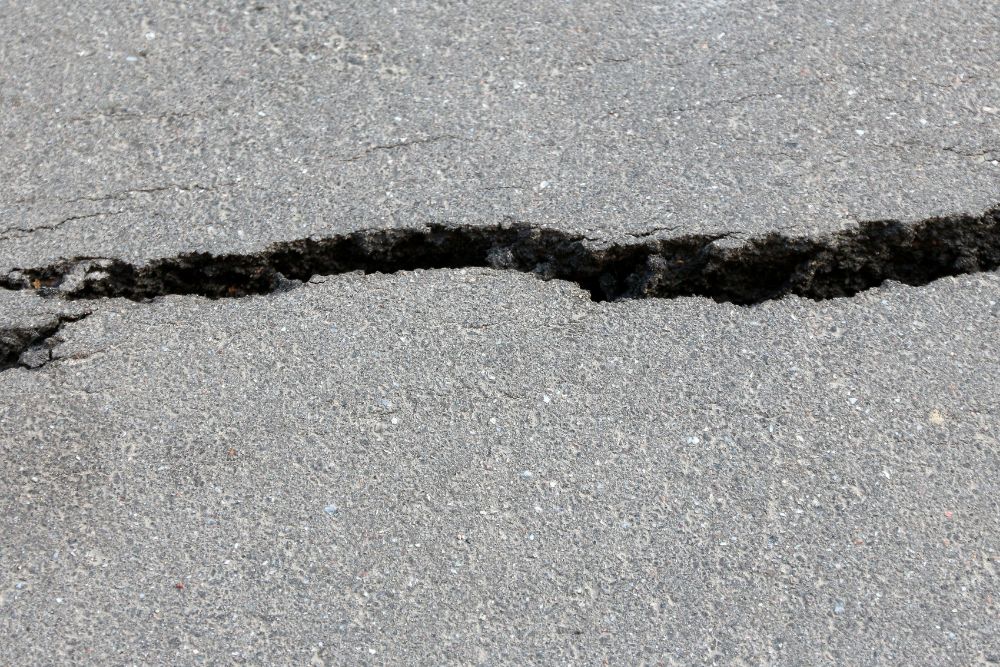
Before diving into the repair process, it’s paramount to accurately ascertain the extent of the damage to your exposed aggregate driveway. A meticulous inspection plays a vital role in deciding the most suitable method to patch exposed aggregate, guaranteeing a successful repair.
Start by keeping an eye out for visible cracks in the concrete surface, particularly in areas with exposed aggregate. Though they may seem insignificant, these cracks can escalate into more substantial issues if neglected. Subsequently, examine for any chipped or broken pieces in the aggregate. These damages often indicate underlying cracks in the concrete, necessitating more rigorous repair methods.
Discolouration or an uneven texture in the exposed aggregate may also hint at damage underneath. This usually suggests a more profound issue that may not be apparent on the surface. Moreover, any gaps or separation between the aggregate and the concrete can signal structural issues that demand immediate intervention.
Lastly, it’s essential to note any water accumulation or drainage issues in the damaged area. These are usually associated with cracks or damage in the concrete. Overlooking such signs can worsen the issue, leading to more expensive repairs down the line.
Gathering Necessary Supplies
The next vital step involves gathering the necessary supplies.
The main materials for the repair are epoxy adhesive and epoxy resin. These two work cohesively to bind the pea gravel and fill the crack. A putty knife is a tool you can’t do without when applying these substances and smoothing out the repaired surface. Furthermore, a concrete sealant is necessary to layer over the repair, helping to ward off future cracks.
Additionally, it’s crucial to source aggregate that closely aligns with your existing concrete’s color and texture. This attention to detail will aid in maintaining the visual consistency of your driveway and prevent unwanted changes.
As you gather these supplies, remember that preparation and precision significantly impact the success of your repair work. With the right tools and materials, your driveway can be restored to its former glory, remaining a smooth and attractive part of your home.
Preparing the Driveway Surface
To achieve a high-quality, durable driveway repair, we stress the importance of meticulous preparation of the driveway surface. This critical phase ensures the repair materials bond securely with the existing concrete surface, offering a long-term resolution to your crack problems. Neglecting or rushing this step could lead to a subpar repair job that won’t stand the test of time, squandering your valuable time, effort, and resources.
To effectively prep your driveway surface, our team at Smooth Concrete recommends following these three key steps:
- Clean the Area: Our team ensures that all loose particles, dust, and debris are removed from the crack and its surroundings. This provides a pristine surface for the repair material to adhere to.
- Deep Clean the Concrete Surface: We use a pressure washer to eradicate any deeply ingrained dirt or stains. This step not only prepares the surface for repair but also rejuvenates the appearance of your entire driveway, as part of our comprehensive service.
- Allow the Surface to Dry: Our experts ensure the concrete surface is completely dry before applying the repair material. The absence of water guarantees optimal bonding between the old and new concrete, promising a seamless finish.
Applying the Concrete Patch
The next step is the correct preparation of the concrete surface – the application of the concrete patch. This step is vital and involves the use of epoxy adhesive and resin.
We pay meticulous attention to the proper filling and leveling techniques, ensuring every repair is seamless. It’s also fundamental that the patch is given adequate time to dry, a detail we never overlook, guaranteeing every repair job we undertake is a success.
Preparing the Concrete Surface
Before our expert team applies a concrete patch, we meticulously prepare the cracked surface to ensure optimal adhesion and longevity of the repair. This process involves a few crucial steps.
- Our first task is to sweep the surrounding surface thoroughly using a stiff-bristled broom. This step removes all loose debris and ensures a clean working environment for the repair.
- Following this, we take great care to clean the crack meticulously using a nylon brush. This step ensures that the crack is completely devoid of any debris before we proceed further. It provides a clean base for the patch to adhere effectively.
- Finally, we apply a thin layer of high-quality epoxy adhesive to the sides and bottom of the crack. The adhesive acts as a bonding agent, effectively connecting the new patching material to the existing concrete.
Applying the Patch Mix
After ensuring a flawlessly prepared surface, our expert team moves on to the next step, which is the application of the patch mix.
Our process begins with the use of a putty knife to apply a light layer of epoxy adhesive to the sides and bottom of the crack. We patiently wait until the epoxy loses its wet appearance but retains a sticky surface. At this stage, we inject an epoxy resin into the crack. Any excess resin is skillfully removed to level off the surface.
Next, we cover the patch mix with matching aggregate, spreading it evenly for a seamless blend with the existing concrete. This is then sealed with additional epoxy. After a 24-hour curing period, we apply a concrete sealant for added waterproofing.
This careful and precise process not only restores your driveway’s aesthetics but also its functionality.
Ensuring Proper Drying Time
At Smooth Concrete, Melbourne’s premier concreting company, we believe in the importance of ensuring proper drying time for long-term effectiveness of any repair. Adhering strictly to the recommended drying times at each stage of the patch application process is a crucial part of our work.
- Our first step involves allowing the epoxy adhesive to dry until it loses its wet appearance but remains sticky. This is a vital aspect of our process as it ensures effective bonding of the new patching material.
- After filling the crack with resin, our dedicated team patiently waits for 24 hours. We understand that this allows the patch and aggregate to set correctly before proceeding.
- Finally, we apply the concrete sealant over the patched area and wait another 48 hours before we advise you to use your driveway as normal. This final step in our process provides waterproofing and secure bonding, ensuring your driveway stands the test of time.
Perfecting the Surface Appearance
Once the primary repair work is finalised, it’s crucial to focus on enhancing the surface appearance of the cracked concrete driveway. Our experienced team follows a series of meticulous steps, ensuring a flawless blend with the existing concrete.
Our process initiates with the deployment of a crack chaser blade, an essential tool that creates uniform edges and smooth sides of the crack. This crucial step ensures an even surface appearance and effectively preps the area for the application of a thin layer of epoxy adhesive. At Smooth Concrete, we consider this adhesive vital for bonding the fresh patching material to the old concrete, guaranteeing a robust, long-lasting repair.
Following this, our team proceeds to the injection of epoxy resin into the crack, designed to fill the crack up to the concrete’s surface. Any excess material is then delicately scraped off to align it with the rest of the driveway’s level. Subsequently, we introduce matching aggregate onto the patch and distribute it evenly, emulating the texture of the adjacent concrete. We then apply more epoxy to secure the aggregate, which further refines the surface appearance.
The culmination of our process involves the application of a concrete sealant across the patch area. This step is multifunctional, as it not only provides waterproofing but also lends the surface a polished finish. After a requisite waiting period of 48 hours, your driveway is ready for regular use.
At Smooth Concrete, we’re committed to providing our Melbourne clients with superior concreting solutions, ensuring your driveway looks as good as new.
Preserving Your Repaired Driveway
After performing a seamless repair and achieving a visually pleasing finish, it is just as critical to shift your focus towards the preservation of your newly repaired driveway. This is key in ensuring its longevity and durability. The process of preserving your repaired driveway takes a few crucial steps that not only secure the repair, but also play a significant role in extending the lifespan of the entire driveway.
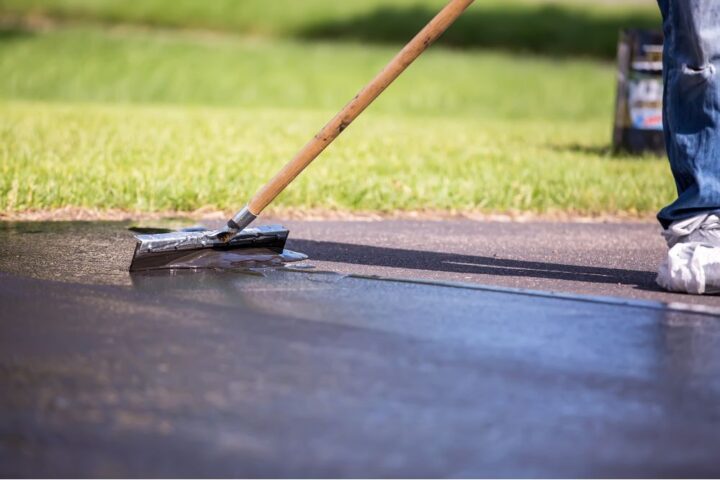
Firstly, it’s important to apply a concrete sealant over the repaired area. As professional concreters, we can tell you that this sealant is a must-have. It provides an essential layer of waterproofing that protects your repair from weather damage and wear.
Secondly, we always advise our clients to give the patch and aggregate ample time to set. We recommend a minimum of 24 hours before using the driveway as usual.
Lastly, we’d like to remind you that safety always comes first. Be sure to equip yourself with work gloves, safety goggles, and a face mask when working with potentially hazardous materials such as epoxy and concrete. It’s important to avoid direct skin contact with epoxy and to avoid inhaling its fumes. Also, be mindful of concrete chips that may cause injury.
Frequently Asked Questions
Can You Repair Cracks in Exposed Aggregate Concrete?
The answer is a resounding yes. Our skilled team can professionally handle this task by first meticulously cleaning the crack. Next, we apply a high-quality epoxy adhesive, followed by filling the crack with a sturdy epoxy resin. To ensure a seamless finish, we then add matching aggregate. The final step involves sealing with a waterproof sealant, a crucial step in our process that aids in future crack prevention.
Why Is My Aggregate Driveway Cracking?
There could be a few reasons why you’re seeing these signs of damage. It could be down to freeze-thaw cycles, the pressure of excessive weight, shrinkage occurring during the curing process, or even poor installation techniques. Sometimes, it could be due to chemical exposure.
All these ‘crack causes’ can compromise the integrity of your concrete driveway, leading to visible fractures. We at Smooth Concrete are committed to helping you understand and resolve such issues. Stay tuned to our blog for more insights into the world of concrete!
How Do You Seal Exposed Aggregate Concrete Driveway?
Our sealing process entails thoroughly cleaning the surface, applying a high-quality concrete sealer, and ensuring it is spread evenly. We utilise various sealing techniques to guarantee a durable finish, which not only improves the aesthetic appeal of your driveway but also enhances its lifespan.
Can You Match Exposed Aggregate Concrete?
Yes, you can match exposed aggregate concrete, and we can achieve this through meticulous Aggregate Selection. The secret lies in opting for a concrete base mix and aggregate that harmoniously blends with the existing colour scheme. This method ensures a seamless and long-lasting repair.
Conclusion
Repairing a crack in an exposed aggregate concrete driveway involves several key steps and must be done correctly for a flawless finish.
If you’ve got a crack in your exposed aggregate driveway that you need repaired, give us a call now on 0403 292 005 or email luke@smoothconcrete.com.au.