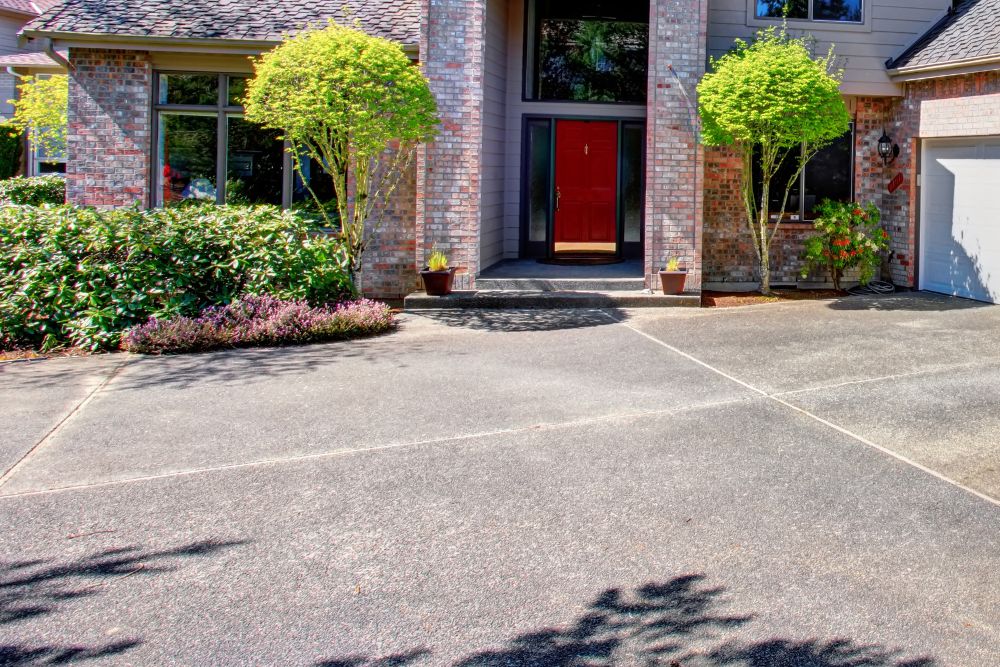
Are you looking to refinish your exposed aggregate driveway?
Due to the finish of exposed aggregate, the process is slightly more complex than a regular concrete driveway.
Overview of Refinishing an Exposed Aggregate Concrete Driveway
Refurbishing an exposed aggregate concrete driveway involves:
- Thorough surface preparation
- Crack repair using epoxy resin
- Proper sealer removal
- Careful area protection
- Stencil filling for a smooth finish
- Decorative fleck addition
- Precise sealer application
- Weather-resistant measures
- Final finishing touches
This detailed process ensures a durable and expertly renovated driveway that improves its appearance and longevity.
Keep reading for more details on each step of the process.
Surface Preparation
For optimal results in refinishing an exposed aggregate concrete driveway, thorough surface preparation is essential. The process begins with high-pressure washing the driveway to remove dirt, mould, and debris, ensuring a clean surface for the upcoming refinishing tasks. It is crucial to repair any cracks in the driveway using a two-part epoxy resin and sand mixture. This repair not only ensures a smooth finish but also prevents further damage to the driveway. Additionally, removing any existing concrete sealer is necessary to allow new resurfacing materials to bond effectively to the exposed aggregate concrete.
During the surface preparation phase, it is important to protect surrounding areas from overspray to prevent any damage. Furthermore, when filling deep stencils, it is recommended to use a skim trowel instead of grinding to save on costs and maintain the original design of the driveway. By carefully following these surface preparation steps, the foundation for a successful exposed aggregate concrete driveway refinishing project is established.
Cracks Repair
Repairing cracks in exposed aggregate concrete driveways involves using a two-part epoxy resin and sand mix to effectively fill and seal the damaged areas, ensuring the structural integrity of the driveway is maintained. The epoxy resin not only helps in filling the cracks but also prevents further damage, making it a crucial step in driveway maintenance.
If there are deep stencils in the concrete surface, they can be filled with a skim trowel to create a smooth finish. Prompt repair of cracks is essential to prevent them from worsening and compromising the overall appearance of the driveway.
Sealer Removal
Before starting the process of refinishing an exposed aggregate concrete driveway, it is essential to remove the current sealer. Knowing the various types of sealers and the methods for their removal is crucial to guarantee a successful refinishing job.
Properly preparing the surface by stripping the sealer ensures that new coatings will adhere well, avoiding potential adhesion issues and ensuring a long-lasting finish.
Sealer Types
When refurbishing an exposed aggregate concrete driveway, choosing the right type of sealer is essential to protect and enhance its appearance. There are two main types of sealers commonly used for exposed aggregate concrete: film-forming sealers and penetrating sealers.
Film-forming sealers create a protective layer on the surface of the concrete, providing good protection against stains while enhancing the colour and sheen of the aggregate. Penetrating sealers, on the other hand, penetrate into the concrete to offer protection without changing the surface’s appearance.
Selecting the appropriate sealer type based on the driveway’s specific requirements is crucial for achieving the best results. It is important to properly remove any old sealers before applying a new one to ensure proper adhesion and long-lasting protection.
Removal Methods
Efficiently removing sealer from exposed aggregate concrete driveways requires careful consideration of suitable removal methods to avoid damaging the aggregate surface. Chemical strippers, mechanical methods like grinding or sandblasting, sanding, and power washing are effective techniques for sealer removal.
It is crucial to handle the removal process with care to prevent any harm to the exposed aggregate. Professional services can also be enlisted to ensure the safe and efficient removal of sealer from exposed aggregate concrete driveways.
These methods, when executed correctly, can help restore the driveway’s appearance and prolong its durability.
Area Protection
To protect the surrounding environment during the refinishing process, it is vital to take careful area protection measures to preserve the integrity of the exposed aggregate concrete driveway project.
Use dust sheets or plastic sheeting to cover surrounding areas and shield them from overspray that may occur during the refinishing process. Ensure protective barriers are in place around flower beds, grass, and other landscaping features near the driveway to prevent any potential damage from refinishing materials.
It is advisable to mask off edges and borders with masking tape to achieve clean lines and avoid accidental overspray onto adjacent surfaces.
Furthermore, consider using temporary fencing or warning tape to establish a clear boundary to prevent foot traffic on the refinished driveway while it cures. Proper area protection not only preserves the integrity of the surrounding landscape but also guarantees a professional and neat finish for the exposed aggregate concrete driveway.
Stencil Filling
Utilising a skim trowel for stencil filling plays a crucial role in achieving a refined surface on the exposed aggregate concrete driveway. This step is essential in the process of refinishing the driveway to ensure a smooth and uniform appearance.
Here are key points to consider during the stencil filling stage:
- Precision: Careful attention must be given to filling deep stencils accurately to maintain the overall aesthetic appeal of the driveway.
- Cost-Effective: Skim trowelling is preferred over grinding as it helps to save costs during the resurfacing process while providing a professional finish. This method can save up to AUD 200 in the resurfacing process.
- Smooth Finish: The filling process is designed to create a seamless and polished surface on the exposed aggregate concrete driveway.
- Durability: Properly filling the stencils is crucial for enhancing the durability of the resurfaced driveway, ensuring it can withstand daily use and weather elements effectively.
Texture Application
For an improved finish on exposed aggregate concrete driveways, applying texture involves adding a topcoat or base coat using a spray gun to create an extra layer with a non-slip surface. This process may also involve skim trowelling over deep stencils, providing a cost-effective alternative to grinding.
Using a spray gun during texture application can result in a smooth finish on the exposed aggregate concrete surface. Additionally, incorporating black and white specks into the texture application adds a speckled feature to the driveway, enhancing its visual appeal.
To further protect the refurbished driveway, it is advisable to apply two coats of acrylic sealer after the texture application. These sealers help protect the driveway from weather elements and wear, extending the lifespan of the refurbished surface. By carefully carrying out the texture application process, homeowners can achieve a durable and visually appealing finish on their exposed aggregate concrete driveway.
Fleck Addition
By applying decorative flecks, you can achieve a desired texture that not only elevates the aesthetic appeal but also provides added protection against weather elements and wear.
Understanding the nuances of fleck addition is essential in creating a balanced and visually appealing finish for the driveway.
Enhancing Surface Appearance
Enhancing the visual appeal of an exposed aggregate concrete driveway can be achieved through the addition of specks, which create a distinctive speckled feature on the surface. This technique not only adds aesthetic value but also provides a protective layer against weather and wear.
The process involves dispersing black and white specks evenly onto the concrete using a hopper gun operated with compressed air. To ensure durability, two coats of acrylic sealer are then sprayed over the specks.
Speck addition is a popular choice for beautifying and safeguarding exposed aggregate concrete driveways, offering a customisable and attractive finish that enhances the overall look of the driveway.
Applying Decorative Flecks
Adding decorative specks to an exposed aggregate concrete driveway enhances its visual appeal and provides a protective layer against weather and wear. These specks are incorporated during the finishing process to create a speckled or textured effect, enhancing the overall aesthetics.
Typically, black and white specks are used to achieve a classic and stylish appearance. To ensure an even distribution, the specks are evenly dispersed using compressed air. After adding the specks, it is advisable to apply two coats of acrylic sealant.
This sealant not only protects the surface from weather elements and wear but also adds a layer of durability to the decorative specks, prolonging their visual impact on the driveway.
Achieving Desired Texture
Incorporating speckles into the exposed aggregate concrete surface not only improves its visual appeal but also introduces a unique texture that adds depth and character to the driveway.
Adding black and white speckles to the concrete creates a mottled feature, offering an aesthetically pleasing finish.
To ensure an even distribution of speckles, a hopper gun with compressed air should be used during application.
It is important to apply two coats of acrylic sealer to protect the speckles from weather and wear, ensuring longevity and durability.
Thoughtful application of speckles not only provides a decorative texture but also plays a crucial role in enhancing the overall aesthetic appeal of the driveway.
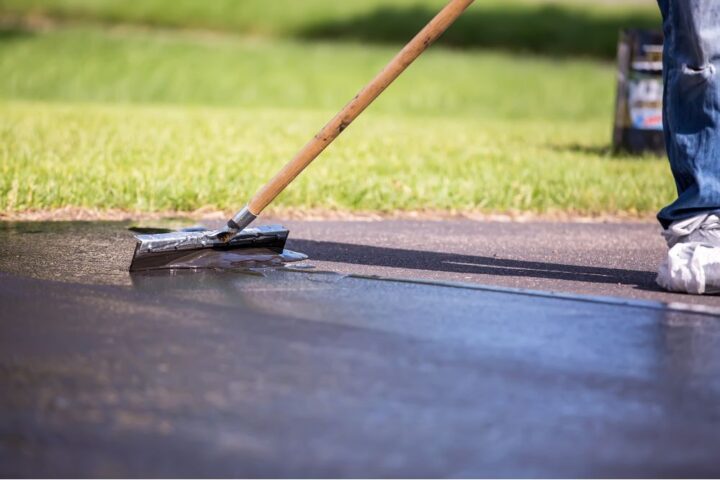
Sealer Application
To protect an exposed aggregate concrete driveway from water damage, stains, and wear, applying a high-quality sealer is essential. Sealer application not only acts as a protective barrier but also enhances the colour and texture of the exposed aggregate, giving it a vibrant and polished look.
It is crucial to apply the sealer in dry weather conditions to ensure proper adhesion and curing. When applying the sealer, it is recommended to use multiple thin coats rather than one thick coat. This method ensures better coverage and improves the durability of the protective layer.
Additionally, to maintain the beauty and longevity of the exposed aggregate driveway, it is advised to reapply the sealer every 2-3 years. By following these steps and using the right products, the driveway will not only be well-protected but will also retain its aesthetic appeal for years to come.
Weather Protection
To ensure the longevity of an exposed aggregate concrete driveway, it is essential to apply a high-quality sealant for weather protection. This sealant acts as a barrier, shielding the driveway from rain, UV rays, and moisture that can cause damage over time.
Sealant for Durability
For improved durability and weather protection of exposed aggregate concrete driveways, it is crucial to apply a high-quality sealant. Sealants act as a barrier against various weather elements, ensuring the long-lasting quality of the driveway surface. Here are some key points emphasising the importance of sealants:
- Sealants protect against UV rays, rain, and snow, preserving the driveway’s integrity.
- High-quality sealants enhance the colour and appearance of the exposed aggregate, extending its lifespan.
- By forming a barrier that prevents water penetration, sealants reduce the risk of cracks and damage to the surface.
- It is recommended to apply sealant every 1-3 years to maintain the quality and appearance of the exposed aggregate driveway.
Ensure to invest in a reputable sealant to safeguard your driveway against the harsh Australian weather conditions.
Cover During Rain
During wet weather, it’s essential to protect your exposed aggregate concrete driveway by covering it with a waterproof tarp or sheet.
Rain can harm the driveway by seeping into the aggregate surface, leading to erosion and damage over time. By covering the driveway when it’s raining, you can prevent water from penetrating the concrete, reducing the need for frequent repairs.
Keeping the driveway dry with proper covering also lowers the risk of slips and moisture-related problems. Using a waterproof tarp is vital for preserving the appearance and structural integrity of an exposed aggregate concrete driveway in the long run.
Final Finishing
Using a hopper gun to apply a topcoat or base coat is a crucial step in achieving the final finishing of an exposed aggregate concrete driveway. This process adds an additional layer to the surface, providing both protection and a non-slip texture for safe use.
In situations where deep stencils are present, skim troweling can be a cost-effective alternative to grinding, maintaining the integrity of the surface while saving on expenses.
For a more decorative touch, incorporating black and white flecks into the topcoat can create a unique speckled feature on the resurfaced driveway. It is essential to disperse these flecks evenly using compressed air through the hopper gun to ensure a uniform and attractive finish.
To enhance durability and longevity, applying two coats of acrylic sealer after adding the flecks will provide weather resistance and protection against wear, ultimately extending the lifespan of the refinished driveway.
Conclusion
In conclusion, the process of refinishing an exposed aggregate concrete driveway involves thorough surface preparation, crack repair, sealer removal, area protection, stencil filling, fleck addition, sealer application, weather protection, and final finishing.
By following these steps carefully and precisely, you can restore the appearance and functionality of your driveway. Proper maintenance and attention to detail are key in achieving a successful refinishing project.